
Back to Blog
July 14, 2026
The moment the power goes out, your home changes personality. The hum of the refrigerator stops. The thermostat goes dark. The Wi-Fi router blinks off, and suddenly the house feels smaller, quieter, and more vulnerable than it did sixty seconds ago.
Most homeowners instinctively reach for their phone flashlight and wait. That is understandable. But if you have ever sat through a twelve-hour outage watching your freezer thaw, your sump pump sit idle during a rainstorm, or your home office grind to a halt, you know that waiting is not a strategy.
This guide is for homeowners who want to stop reacting to blackouts and start controlling them. We’ll walk through the immediate steps to take in the first fifteen minutes, the hidden infrastructure risks most people miss, and an honest, side-by-side comparison of backup power options. By the end, you will have a complete game plan to make the next outage irrelevant.
Phase 1: The First 15 Minutes — Your Immediate Action Checklist
The first quarter-hour of a power outage is when most preventable damage happens. Voltage spikes, food safety clocks, and safety risks all begin the moment the grid goes down. Here is what to do, in order.
1. Confirm the Scope — Is It Just You, or the Whole Block?
Before you do anything else, take thirty seconds to see what you are dealing with. Look out the window. Are your neighbors’ lights off too? Check your breaker panel with a flashlight. If a single breaker tripped, the fix is a simple reset. If the panel looks normal and the street is dark, you are dealing with a utility-level outage, not a household electrical fault.
This distinction matters. A tripped breaker requires a quick reset or an electrician. A grid-level outage requires you to report it and begin protecting your home.
2. Report the Outage to Your Utility Provider
Your utility company cannot fix what they don’t know about. Call their outage hotline or use their mobile app to report the blackout. Most major utilities use automated systems to map outage clusters in real time, which helps them deploy repair crews efficiently. Don’t assume your neighbor has already called. Report it yourself.
While you are at it, ask for an estimated restoration time. That single piece of information will shape every decision you make over the next several hours.
3. Unplug Sensitive Electronics to Prevent Surge Damage
This step is easy to skip, but it is incredibly costly when ignored. When power returns, the current arrives as a brief, powerful voltage spike. This return surge can destroy electronics that are still plugged in, targeting televisions, computers, gaming consoles, and smart appliances.
What to unplug:
- Desktop computers and monitors
- Televisions and audio equipment
- Gaming consoles
- Wi-Fi routers and smart home hubs
- Kitchen appliances with digital controls
Leave one lamp plugged in so you know when power returns. Pull everything else out of the wall, or ensure it runs through a high-quality surge protector. Basic power strips do not provide surge protection. Look for a device rated in joules with a UL 1449 certification.
4. Secure Your Food and Water Assets Immediately
The food safety clock starts the moment your refrigerator loses power. Set a mental timer. We will cover the exact rules soon, but the immediate action is simple: keep the refrigerator and freezer doors closed. Every time you open them, you let cold air escape. Resist the urge to check on things.
If you have a well pump, it will stop functioning without power. Your water supply is limited to what is currently in your pressure tank and pipes. Fill the bathtub and large containers now, before that reserve runs dry.
Phase 2: Managing Your Home’s Microclimate and Food Safety
Once the immediate checklist is complete, your attention shifts to slower-burning problems: the food in your refrigerator, the temperature in your home, and your water supply.
The Golden Rules of Refrigeration — The 4-Hour Window
The FDA’s food safety guidelines are clear. It is worth knowing them before an outage rather than searching for them in the dark.
- Refrigerator: A closed refrigerator keeps food safe for 4 hours after power loss, assuming it was at or below 40°F before the outage.
- Full Freezer: A fully packed freezer holds safe temperatures for 48 hours.
- Half-Full Freezer: A partially packed freezer holds safe temperatures for 24 hours.
The rule is simple: discard refrigerated food that has been above 40°F for more than two hours. When in doubt, throw it out. The cost of food poisoning far exceeds the cost of replacing groceries.
To take the guesswork out of the equation, keep an appliance thermometer in your refrigerator and freezer at all times. You can also fill empty freezer space with bags of ice or frozen water bottles in advance. Fuller freezers hold their temperature longer.
Passive Temperature Control — Keeping Warm or Cool Without HVAC
Your heating and cooling system is hardwired, meaning a portable solution cannot easily replace it. Passive strategies will buy you meaningful time.
In winter:
- Close off unused rooms to concentrate body heat in a smaller space.
- Hang blankets over doorways to block drafts.
- Layer clothing aggressively.
- If you use a wood-burning fireplace, ensure the flue is open and the area is ventilated.
- Critical safety rule: Never use a gas oven, outdoor propane heater, or charcoal grill inside the home to generate heat. Carbon monoxide poisoning is a leading cause of non-fire fatalities during power outages.
In summer:
- Move to the lowest level of the home, which stays naturally cooler.
- Open windows on opposite sides of the house at night to create cross-ventilation.
- Use battery-powered fans to circulate air.
- Stay hydrated. Heat exhaustion develops quickly, especially for children, the elderly, and pets.
Water Security — What to Do If You Rely on a Well Pump
Homeowners on municipal water systems keep water pressure during an outage because utility infrastructure operates independently. But if your home draws from a private well, your water supply relies entirely on an electric pump. When the power goes out, the pump stops.
Most well systems have a pressure tank that holds a small reserve, which is usually enough for a few toilet flushes. After that, you are out of water. This makes well-dependent homeowners vulnerable during extended outages, and highly motivated to invest in backup power solutions.
Fill bathtubs and large pots immediately. For long-term planning, a whole-home generator is the only solution that keeps a well pump running automatically.
Phase 3: The Hidden Threats to Your Home’s Infrastructure
Standard power outage guides tell you to light candles and play board games. They skip the part where your home quietly accumulates thousands of dollars in structural damage. These are the risks that separate a minor inconvenience from a financial disaster.
Sump Pump Failure — The Basement Flooding Risk
If your home has an electric basement sump pump, a power outage during a rainstorm is a genuine emergency.
When the grid goes down, the pump stops, but groundwater keeps rising. Water accumulates in your sump pit and overflows into your basement. This failure causes massive damage, ruining flooring, destroying drywall, and triggering mold growth. Repairs can easily cost tens of thousands of dollars.
Your options:
- Battery backup sump pump: A secondary pump powered by a dedicated battery. These offer a solid intermediate solution but have a limited runtime of 8 to 12 hours and require regular battery maintenance.
- Water-powered backup pump: Uses municipal water pressure to pump water away. This is not an option for well-dependent homes, and it struggles in high-volume situations.
- Whole-home standby generator: This setup keeps your primary sump pump running indefinitely, exactly like normal operation.
Mold and Humidity Spikes in Summer
This risk is invisible until it becomes an expensive headache. During summer outages, your air conditioning system goes offline. Because air conditioners act as dehumidifiers, indoor humidity climbs rapidly when they stop running.
Sustained humidity above 60% allows mold to colonize within 24 to 48 hours. It thrives in basements, crawl spaces, closets, and behind walls. Professional mold remediation is expensive and dangerous to ignore, as certain mold species present genuine health risks. Opening windows helps, but it also invites outdoor humidity inside. The only total solution is restoring power to your HVAC system.
Frozen Pipes in Winter
A home that loses heat during a winter outage puts its plumbing at risk. Water expands when it freezes, which cracks copper and PVC pipes. These cracks often occur in hidden areas like crawl spaces or inside walls. When the home warms up and the ice thaws, those cracks turn into active leaks.
Pipes in exterior walls, unheated garages, and crawl spaces are highly vulnerable. If your outage lasts more than a few hours during a freeze, take action:
- Open cabinet doors under sinks on exterior walls to let warm indoor air circulate around the pipes.
- Let faucets drip slightly to keep water moving through the lines.
- Locate your main water shutoff valve. If a pipe bursts, shutting off the main supply immediately limits the damage.
- If the freezing temperatures are severe and the outage drags on, plan to stay elsewhere.
Phase 4: The Three Tiers of Emergency Power — Survival vs. Continuity
Once you manage the immediate crisis, the ultimate question is simple: how do I make sure this never disrupts my life again?
There are three ways to answer that question. Here is an honest look at each option.
Tier 1: The Survivalist Setup — Batteries, Flashlights, and Dry Goods
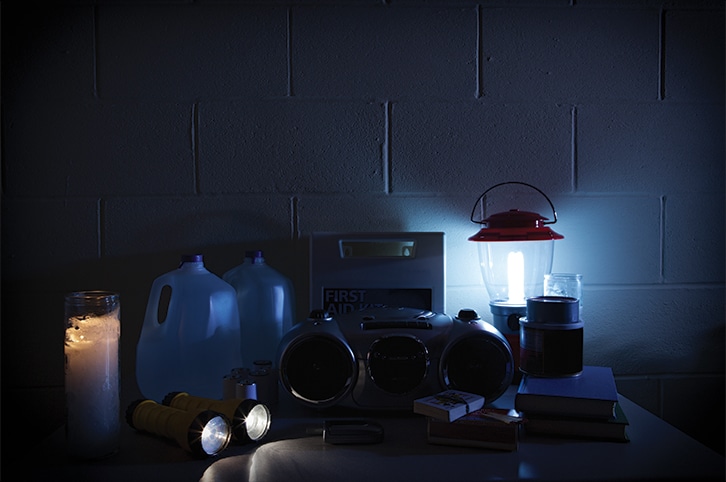
- What it includes: Flashlights, battery-powered lanterns, portable power banks, a cooler with ice, bottled water, non-perishable food, and an emergency radio.
- What it costs: A few hundred dollars for a well-stocked kit.
- What it does well: Keeps you informed, illuminated, and fed during a short outage. It is the right baseline for every household, including apartments and rentals where permanent installations are not allowed.
- Where it falls apart: This setup does nothing for your infrastructure. Your sump pump, HVAC, and well pump remain dead. Your refrigerator starts warming up. After four hours, food spoils. After twelve hours, the house becomes uncomfortable. After twenty-four hours, you risk property damage.
- Who it is for: Renters, apartment dwellers, and homeowners in areas where outages are rare and brief.
Tier 2: The Semi-Prepared Setup — Portable Gas or Inverter Generators
- What it includes: A portable gasoline or inverter generator, heavy-duty extension cords, a manual transfer switch or interlock kit, and stored fuel.
- What it costs: Prices range from a few hundred dollars for basic models to $2,000–$4,000 for high-quality inverter generators that safely power sensitive electronics.
- What it does well: A capable inverter generator keeps your refrigerator running, charges devices, powers a window AC unit, and runs a few lights. For a 24-to-48-hour outage, this is a massive upgrade over flashlights. Inverter generators produce clean power suitable for laptops and medical equipment.
- The reality of operating one during a storm: Marketing brochures rarely match reality. Imagine a storm knocking out your power at 11 PM in freezing weather:
- You must haul a heavy generator out of your garage or shed.
- You must position it at least 20 feet away from any door, window, or vent. Portable generators produce deadly, odorless carbon monoxide. Running one in a garage is fatal.
- You must add fresh fuel. Gasoline degrades after 30 days and damages engines. In regional emergencies, gas stations run out of fuel or have massive lines.
- You must run extension cords from the outside through a propped-open window or door.
- You cannot easily power hardwired appliances like central HVAC, sump pumps, or well pumps without an expensive, manually installed transfer switch.
- You must refuel the engine every 8 to 12 hours, forcing you outside into the storm in the dark.
- Who it is for: Homeowners facing occasional short outages who do not rely on well pumps or hardwired sump pumps, and who are comfortable handling heavy machinery and volatile fuel in bad weather.
Tier 3: The Seamless Continuity Setup — Whole-Home Standby Generators
- What it includes: A permanently installed standby generator running on natural gas or liquid propane, connected to your electrical panel via an automatic transfer switch (ATS).
- What it costs: Total costs range from $7,000 to $15,000 or more, depending on the unit’s capacity, home size, and installation complexity. It is a major investment.
- What it does: When grid power fails, the automatic transfer switch detects the drop within seconds. It instantly disconnects your home from the utility grid to prevent dangerous back-feeding onto power lines, then starts the generator. The system transfers your electrical load automatically, a process that takes 10 to 30 seconds.
Your home continues to run normally. Your central air conditioning or furnace operates. Your refrigerator maintains its temperature. Sump pumps and well pumps run on demand. Your home office stays online, and your lights stay on.
When utility power returns, the system detects the stable grid signal, transfers your home back to utility power, and shuts the generator down automatically.
- The fuel advantage: Standby generators run on your home’s existing natural gas lines or a large liquid propane tank. There is no fuel to store, rotate, or pour. A natural gas generator runs indefinitely as long as the gas supply remains intact, which is almost always the case during electrical outages.
- The safety advantage: The generator lives permanently outdoors, eliminating carbon monoxide risks inside the home. There are no extension cords to trip over and no manual labor required.
- Who it is for: Homeowners who want total continuity rather than managed inconvenience. This is ideal for homes with well pumps, basement sump pumps, medical equipment, or home offices, and for anyone living in regions prone to severe weather or aging power grids.
Phase 5: Side-by-Side Comparison — Portable vs. Standby Generators
The choice between a portable generator and a whole-home standby unit is the most important decision you will make regarding emergency preparedness.
| Feature | Portable Generator | Whole-Home Standby |
| Upfront Cost | $500–$4,000 | $7,000–$15,000+ installed |
| Fuel Source | Gasoline (must be stored and rotated) | Natural gas or liquid propane |
| Setup Time | 15–30 minutes (manual) | 10–30 seconds (fully automatic) |
| Automation | None (requires manual operation) | Full (activates without human intervention) |
| Power Capacity | 3,500–12,000 watts | 10,000–22,000+ watts |
| Powers Central HVAC? | No | Yes |
| Powers Sump Pump? | Only with a manual transfer switch | Yes |
| Powers Well Pump? | Only with a manual transfer switch | Yes |
| Carbon Monoxide Risk | High (must keep 20+ feet from home) | Low (permanently installed outdoors) |
| Fuel Storage Needed? | Yes (gasoline degrades quickly) | No (uses gas line or large home tank) |
| Runs While You Sleep? | No (unsafe to run unsupervised) | Yes (monitors and runs autonomously) |
| Property Value Impact | None | High (recognized home improvement) |
| Best For | Short outages, occasional use | Extended outages, full property protection |
A Note on Carbon Monoxide Safety
This requires absolute emphasis. Carbon monoxide poisoning from portable generators is a recurring tragedy during weather disasters. The Consumer Product Safety Commission reports spikes in generator-related deaths following every major hurricane and winter storm.
The rules are absolute: never run a portable generator inside your home, garage, carport, or near a window or door. Carbon monoxide is completely odorless and colorless. By the time you notice symptoms, you may be too disoriented to escape. Install battery-powered carbon monoxide detectors on every level of your home.
Whole-home standby generators eliminate this risk by design because they are permanently fixed outdoors away from living spaces and require zero human interaction during a storm.
Transitioning from Reactive to Proactive
A power outage tests how well your home handles the unexpected. The immediate steps—checking the neighborhood, reporting the issue, unplugging electronics, and keeping freezer doors shut—are things every homeowner must do.
But long-term protection requires a bigger decision. Flashlights and coolers will get your family through an evening. They will not stop your basement from flooding, your pipes from bursting, your food from spoiling, or your remote job from stalling out during a multi-day blackout.
The three-tier framework helps you match your investment to your actual risk. If you rent an apartment in a city with an incredibly reliable grid, a Tier 1 kit is completely sufficient. If you own a home with a basement, a private well, or a family that depends on constant power, the math changes. A standby generator pays for itself the moment it prevents a single basement flood or frozen pipe disaster.
The goal is to stop spending money fixing the consequences of your home’s vulnerabilities.
Your next step: Take an honest inventory of your home’s electrical dependencies. Which systems would cause serious damage or hardship if they went offline for 48 hours or a week? That list will tell you exactly which tier of preparedness you need.
When you’re ready to explore a standby generator solution, contact PE Home Generators. Our team can help you determine the right Generac generator size and backup power setup for your home, your essential systems, and your budget.
Recent News
Generac vs. Kohler: Which Whole-House Generator Is Right for Your Home?
September 29, 2026
How Long Can a Home Generator Run During a Power Outage?
September 29, 2026

Smart Homes Need Reliable Power: Keeping Modern Homes Running Without Interruption
September 3, 2026
The Most Common Problems Homeowners Face and How to Prevent Them
August 20, 2026
El Niño: What Does El Niño Mean for Connecticut and How to Be Prepared
July 29, 2026
Why Today’s Homes Are Using More Power Than Ever Before
July 27, 2026